If you’ve ever encountered problems with your solar charger, don’t fret; you’re not alone. In this article, we’ll explore some common issues that solar charger owners often face and provide troubleshooting tips to help you resolve them. Whether it’s a problem with charging speed, connectivity, or overall performance, we’ve got you covered. So, let’s dive in and get your solar charger back up and running efficiently!
Battery Not Charging
Check Solar Panel Connection
If your solar charger is not charging the battery, the first thing you should check is the connection between the solar panel and the charger. Ensure that the connections are secure and that there is no loose or damaged wiring. Sometimes, the problem can be as simple as a loose connection.
Ensure Sufficient Sunlight
The effectiveness of a solar charger relies on sunlight, so it’s important to ensure that there is sufficient sunlight for the charger to work properly. Make sure that the solar panel is not blocked by any obstructions such as trees, buildings, or shadows. Clear any debris that may be covering the panel to maximize its exposure to sunlight.
Clean Solar Panel Surface
A dirty solar panel can significantly reduce its efficiency and hinder the charging process. Dust, dirt, and debris can accumulate on the surface of the panel, preventing it from effectively absorbing sunlight. Ensure that the panel is clean by gently wiping it with a soft, lint-free cloth or using a mild cleaning solution specifically designed for solar panels.
Inspect and Replace Wiring
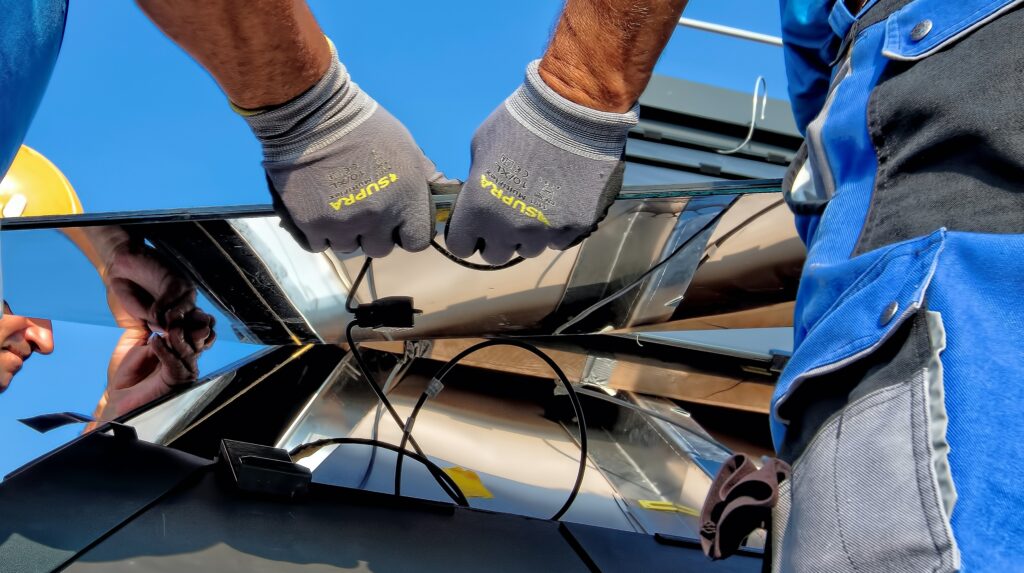
If the previous steps did not resolve the issue, it is worth inspecting the wiring connecting the solar panel to the charger. Look for any frayed or damaged wires that may be interrupting the charging process. If any issues are found, replace the faulty wiring with new ones to ensure a proper connection.
Test and Replace Controller
The solar charger’s controller is responsible for regulating the charging process and protecting the battery from overcharging. If none of the previous steps solve the issue, it may be necessary to test and replace the controller. Consult the manufacturer’s instructions or seek professional assistance to perform the necessary testing and replace the controller if needed.
Slow Charging Speed
Evaluate Panel Efficiency
If your solar charger is charging your battery, but at a slow speed, the panel efficiency could be the cause. Different solar panels have varying levels of efficiency, with some being more effective at converting sunlight into electricity. Evaluate the efficiency of your panel and consider upgrading to a higher efficiency model to improve charging speed.
Check Panel Positioning
The positioning of the solar panel plays a crucial role in its effectiveness. Ensure that the panel is oriented correctly and facing towards the sun. Adjust its angle if necessary, following the manufacturer’s instructions or seeking professional advice. Proper panel positioning can significantly enhance charging speed.
Assess Battery Health
A sluggish charging speed could indicate an issue with the battery itself. Evaluate the health of the battery by checking its voltage levels and overall condition. If the battery is old or damaged, it may not be able to accept a charge as efficiently. Consider replacing the battery with a new one to improve charging speed.
Inspect and Replace Cables
Faulty or damaged cables can impede the charging process and reduce overall charging speed. Inspect the cables connecting the solar panel, charger, and battery for any signs of wear or damage. If any issues are found, replace the cables with new ones that are in good condition to ensure optimal charging speed.
Upgrade to Higher Wattage Panel
If all else fails, upgrading to a higher wattage solar panel may be the solution. A higher wattage panel can provide more power output, allowing for faster charging speeds. Consult the manufacturer’s recommendations or seek professional guidance to determine the appropriate wattage for your needs and upgrade your panel accordingly.
Device Not Charging
Check Device Compatibility
Before troubleshooting the device not charging issue, ensure that the device is compatible with the solar charger. Some devices may require specific charging specifications that the charger might not meet. Refer to the device’s user manual or contact the manufacturer to verify compatibility.
Inspect and Replace Charging Cable
A faulty or damaged charging cable can prevent the device from charging properly. Inspect the charging cable for any visible signs of wear or damage. If any issues are detected, replace the cable with a new one that is compatible with both the device and the charger.
Evaluate Output Voltage
The output voltage of the solar charger should match the voltage requirements of the device you are trying to charge. Check the charger’s output voltage rating and compare it to the device’s voltage requirement. If they do not match, the device may not charge or may charge slowly. Consider using a different charger that matches the device’s voltage requirement.
Test and Replace Device Battery
If the device is still not charging after checking compatibility, the issue may lie with the device’s battery. Test the battery’s performance and capacity using appropriate tools or consult a professional. If the battery is faulty or no longer holds a charge, it may need to be replaced to resolve the charging issue.
Reset or Update Device Software
Sometimes, the device’s software can interfere with its charging process. Try resetting the device by turning it off and on again. If that doesn’t work, check for any available software updates and install them. Updating the device’s software can often resolve charging issues related to software compatibility or bugs.
Overheating Issue
Ensure Proper Ventilation
Overheating can be a common issue with solar chargers, especially if they are not properly ventilated. Make sure that the charger is placed in a well-ventilated area, allowing heat to dissipate efficiently. Avoid placing the charger in enclosed spaces or areas with poor airflow, as it can contribute to overheating.
Check for Shading or Obstructions
Shading or obstructions on the solar panel can cause it to overheat. Ensure that there are no objects, trees, or structures casting shadows over the panel during peak sunlight hours. Remove any obstructions that may be limiting the panel’s exposure to sunlight and causing it to overheat.
Evaluate Ambient Temperature
Extreme temperatures can impact the performance of a solar charger and cause overheating. Consider the ambient temperature in the charging area and take necessary precautions. If the charger is operating in excessively high temperatures, it may need additional cooling measures, such as a fan or shade.
Inspect and Clean Solar Panel
A dirty solar panel can reduce its efficiency and lead to overheating. Regularly inspect the panel for any dust, dirt, or debris and clean it if necessary. Gently wipe the panel’s surface with a soft, lint-free cloth or use a mild cleaning solution designed explicitly for solar panels. Clean panels maintain better heat dissipation, reducing the risk of overheating.
Monitor and Adjust Charging Current
Some solar chargers allow you to monitor and adjust the charging current manually. Lowering the charging current can help prevent overheating in certain cases. Refer to the charger’s user manual to learn how to monitor and adjust the charging current. Keep an eye on the charger’s temperature and make appropriate adjustments to avoid overheating.
Frequent Disconnects
Tighten and Secure Connections
Frequent disconnects can be frustrating, but often, the solution is as simple as tightening and securing the connections. Ensure that all connections between the solar panel, charger, and battery are tight and properly secured. Loose connections can interrupt the charging process and cause frequent disconnects.
Inspect and Replace Wiring
If tightening the connections does not resolve the issue, it may be necessary to inspect the wiring for any signs of wear or damage. Look for frayed or damaged wires that may be causing the frequent disconnects. Replace any faulty wiring with new ones to ensure a stable and uninterrupted charging process.
Check for Panel Movement
Sometimes, frequent disconnects can occur due to panel movement caused by wind or other environmental factors. Check if the panel is securely mounted or installed. Reinforce the panel’s mounting if necessary. Adding additional support or bracing can help reduce panel movement and minimize the likelihood of disconnects.
Evaluate Controller Operation
The solar charger’s controller plays a critical role in maintaining a stable charging connection. If the previous steps did not resolve the issue, evaluate the controller’s operation. Check for any error codes, indicators, or abnormal behavior. Consult the manufacturer’s instructions or seek professional assistance to diagnose and troubleshoot the controller.
Install Additional Support or Bracing
If panel movement continues to be an issue, consider installing additional support or bracing to stabilize the panel. This can be especially useful in areas with high winds or other environmental conditions that may cause excessive movement. Consult a professional or follow the manufacturer’s recommendations for proper installation of additional support or bracing.
Controller Malfunctioning
Test and Reset Controller
If you suspect that the solar charger’s controller is malfunctioning, the first step is to test and reset it. Follow the manufacturer’s instructions to perform the necessary testing procedures. If the controller has a reset function, try resetting it to its default settings. This can often resolve minor issues and restore the controller’s functionality.
Check for Loose or Damaged Wires
A malfunctioning controller may be due to loose or damaged wires. Inspect all wiring connections between the controller, solar panel, and battery for any signs of wear or damage. Tighten any loose connections and replace any faulty wiring to ensure proper functionality of the controller.
Inspect and Replace Fuses
In some cases, a malfunctioning controller can be attributed to blown fuses. Locate the fuses on the solar charger’s controller and check if any are blown. Replace any blown fuses with new ones that have the same rating to restore the controller’s functionality. Consult the manufacturer’s instructions or seek professional assistance if needed.
Upgrade to Higher Quality Controller
If the controller continues to malfunction even after testing, resetting, and checking for loose connections, it may be necessary to upgrade to a higher quality controller. Higher-quality controllers often offer better durability and performance, minimizing the risk of malfunctioning issues. Consult with a professional or follow the manufacturer’s recommendations for compatible controller upgrades.
Seek Professional Repair
If all troubleshooting steps fail to resolve the controller issue, it may be time to seek professional repair. Contact the manufacturer or a reputable solar charger technician for assistance. They can diagnose the specific problem with the controller and provide the necessary repairs or guidance to ensure its proper functioning.
Battery Draining Quickly
Inspect and Limit Background Power Consumption
If you notice that your battery is draining quickly, it’s essential to inspect and limit any unnecessary background power consumption. Some devices or applications may continuously draw power, even when they are not actively in use. Close any unnecessary applications, disable background processes, and adjust settings to minimize power usage when not needed.
Check for Faulty or Aging Battery
A faulty or aging battery can lead to rapid power drain. Inspect the battery for any visible signs of damage, leakage, or swelling. If any issues are detected, consider replacing the battery with a new one that is compatible with your device. A fresh battery can improve overall battery life and prevent quick draining.
Monitor and Adjust Charging Voltage
Charging voltage can affect battery performance and longevity. Monitor the charging voltage and ensure that it is within the recommended range for your specific battery. Different batteries have different optimal charging voltage levels. If the charging voltage is outside the recommended range, adjust it accordingly or consult a professional for guidance.
Check Controller Float and Absorption Settings
The solar charger’s controller may have float and absorption settings that determine how the battery is charged. Incorrect settings can lead to excessive power drain or overcharging, affecting the battery’s performance. Check the controller’s float and absorption settings and make sure they are appropriate for your battery type. Consult the manufacturer’s instructions or seek professional assistance if unsure.
Replace Battery with Higher Capacity
If your battery is consistently draining quickly despite all other troubleshooting efforts, it may be time to consider upgrading to a higher capacity battery. A higher capacity battery can hold more charge, allowing for extended usage without frequent recharging. Consult the device’s specifications and ensure compatibility before replacing the battery.
Inconsistent Power Output
Inspect and Clean Solar Panel
If your solar charger is providing inconsistent power output, it’s crucial to inspect and clean the solar panel. Dust, dirt, or debris on the panel’s surface can reduce its efficiency and hinder power generation. Gently clean the panel using a soft, lint-free cloth or a mild cleaning solution specifically designed for solar panels. Clean panels ensure optimal power output.
Check for Panel Misalignment
Misalignment of the solar panel can affect its power output. Ensure that the panel is correctly positioned and facing the sun directly. Adjust the panel’s angle if necessary to align it properly. Proper alignment ensures optimal solar absorption and consistent power output.
Evaluate Controller Operation
A malfunctioning or improperly functioning controller can lead to inconsistent power output. If the panel and connections are in good condition, but the power output is still inconsistent, evaluate the controller’s operation. Check for any error codes, indicators, or abnormal behavior. Consult the manufacturer’s instructions or seek professional assistance to diagnose and troubleshoot the controller.
Assemble Array with Panels Facing Same Direction
If you have multiple solar panels in an array, ensure that they are all facing the same direction. Panels facing different directions can result in varying power outputs. Adjust the positioning of the panels so that they all face the sun directly. This optimization ensures consistent power output across the array.
Upgrade to Higher Quality Panels
If all other troubleshooting steps fail to provide consistent power output, it may be necessary to upgrade to higher quality panels. Higher quality panels often offer better efficiency, performance, and durability. Consult with a professional or follow the manufacturer’s recommendations for compatible panel upgrades.
Reverse Charging
Ensure Correct Polarity
Reverse charging occurs when the solar charger tries to draw power from the battery instead of charging it. To prevent this issue, ensure that the positive and negative terminals of the solar panel and battery are correctly connected. Double-check the polarity and make sure they match to avoid reverse charging.
Check Controller Diode Function
The solar charger’s controller should have a diode that prevents reverse current flow. If reverse charging persists, inspect the diode for any signs of damage or malfunction. Replace the diode if necessary or consult a professional for assistance in diagnosing and resolving the reverse charging issue.
Evaluate Battery Voltage
In some cases, reverse charging can be triggered by a battery with lower voltage than the solar panel’s output voltage. Ensure that the battery’s voltage matches or exceeds the solar panel’s output voltage. If the battery voltage is lower, it may not be able to accept the charge properly, resulting in reverse charging. Consider upgrading the battery to a higher voltage or seek professional advice.
Replace Faulty Controller
If troubleshooting the previous steps does not resolve the reverse charging issue, it may be necessary to replace the solar charger’s controller. A faulty controller can cause the charging process to malfunction and result in reverse charging. Replace the controller with a new one that is compatible with your system to prevent further reverse charging.
Consult Experienced Installer
Reverse charging can often be a complex issue that requires in-depth knowledge and expertise. If you have exhausted all troubleshooting steps and are still experiencing reverse charging, it is recommended to consult an experienced solar charger installer or technician. They can assess your system, identify the exact cause, and provide appropriate solutions based on their expertise.
Intermittent Connection to Panel
Inspect and Clean Panel Connectors
Intermittent connections to the solar panel can disrupt the charging process. Inspect the connectors between the panel and the charger for any signs of dirt, corrosion, or damage. Clean the connectors using a soft brush or compressed air to remove any debris that may be interfering with the connection. Clean connectors ensure a stable and uninterrupted charging connection.
Check for Loose or Damaged Wires
Loose or damaged wires can contribute to intermittent connections. Check all wiring connections between the panel and the charger for any signs of wear or damage. Ensure that the wires are securely connected and replace any faulty wiring as needed to maintain a stable connection.
Evaluate Controller Connection Points
The solar charger’s controller has connection points that link it to the solar panel. Intermittent connections can occur at these points. Inspect the controller’s connection points and ensure that they are clean and properly connected. Tighten any loose connections and clean the points if necessary. Properly connected and clean connection points help prevent intermittent connections.
Reposition and Secure Panel Mounting
Mounting plays an important role in maintaining a stable connection. If you experience intermittent connections, check the panel’s mounting and reposition it if necessary. Ensure that the panel is securely mounted and not subject to movement or vibration. Consider reinforcing the mounting or using additional securing methods to minimize the likelihood of intermittent connections.
Consider Water-resistant Connectors
In humid or wet environments, moisture can affect the connectors and lead to intermittent connections. Consider upgrading to water-resistant connectors that are designed to withstand moisture and ensure stable connections. Consult a professional or follow the manufacturer’s recommendations for suitable water-resistant connectors that are compatible with your solar charger.
In conclusion, troubleshooting common solar charger issues requires a step-by-step approach to identify and resolve the underlying problems. Whether it’s a battery not charging, slow charging speed, device not charging, overheating issue, frequent disconnects, controller malfunctioning, battery draining quickly, inconsistent power output, reverse charging, intermittent connection to the panel, or any other issue, following the outlined troubleshooting steps can help you resolve the problem and ensure efficient and reliable solar charging. Remember to consult the manufacturer’s instructions or seek professional assistance whenever necessary to ensure safe and proper troubleshooting.
